Pads
Layouts
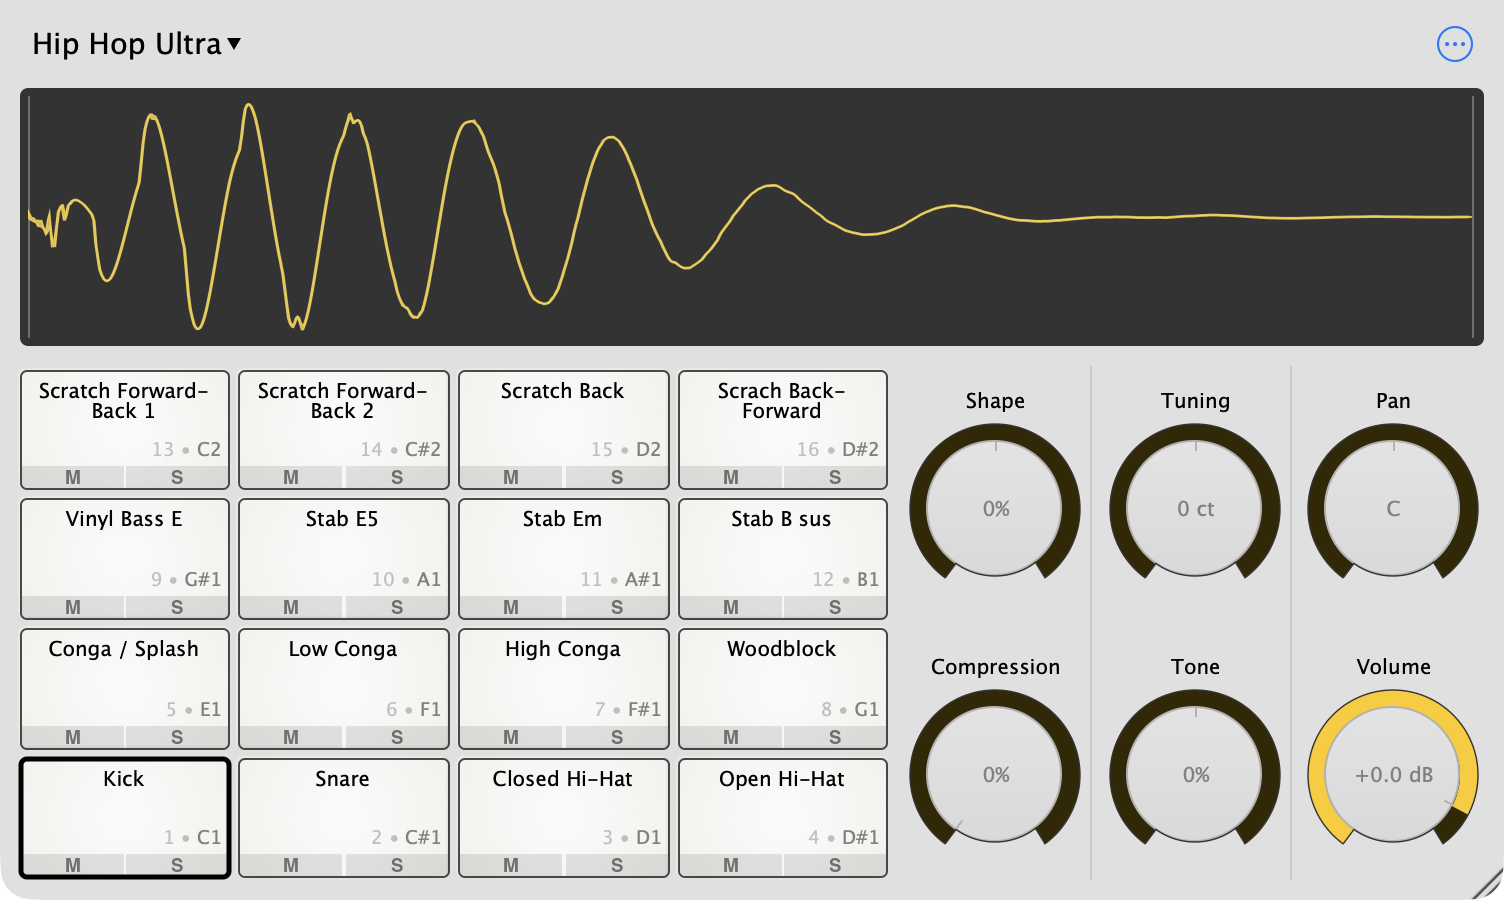
Sitala has two pad layouts. Choose one from Layout in the options menu.
4 x 4 Pads is laid out like an MPC or most pad controllers: pad 1 is at the bottom left, and the numbers go left to right, bottom to top.
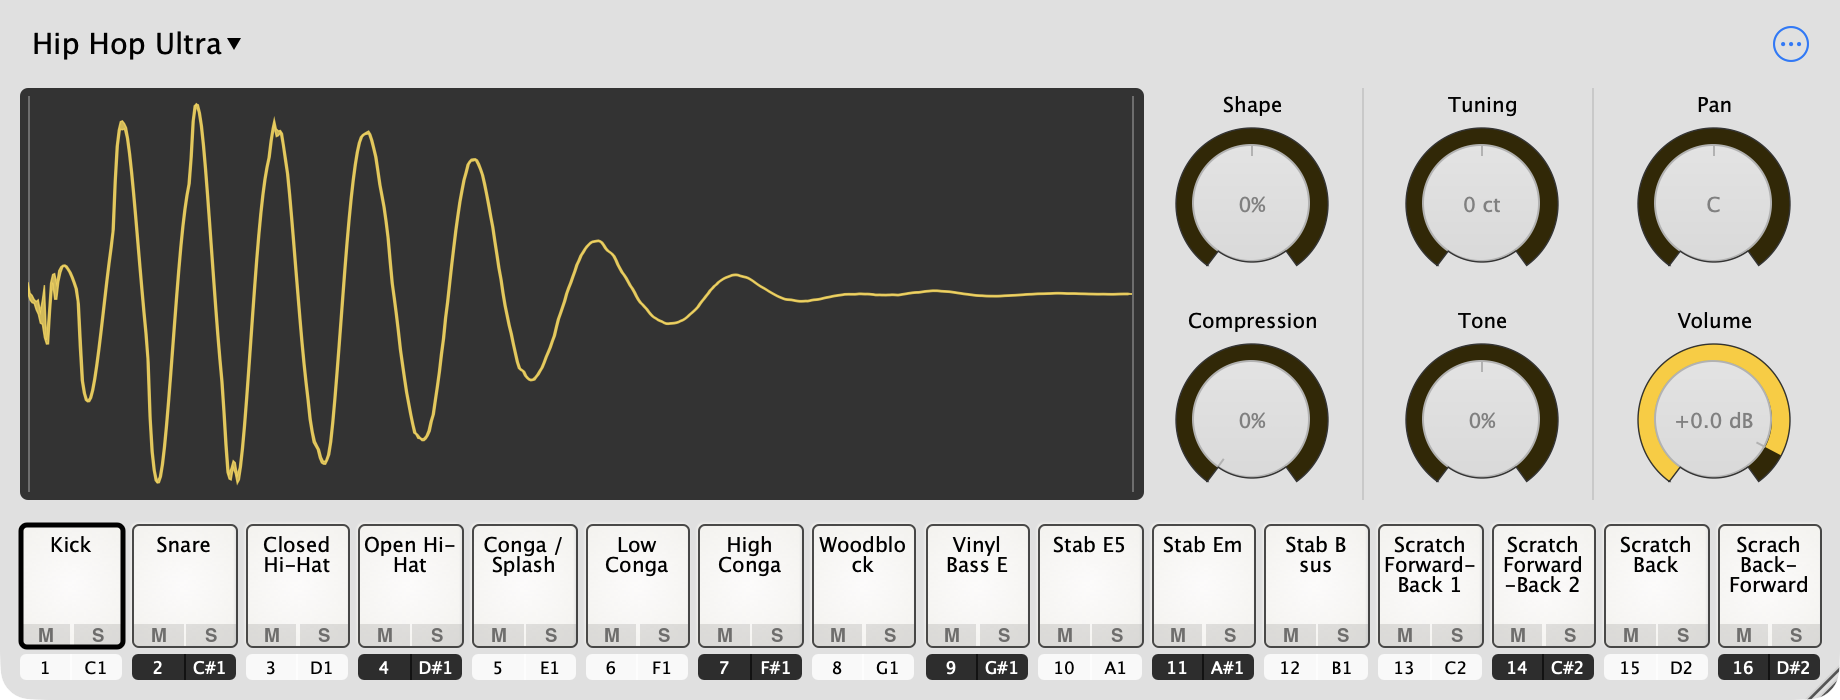
16 x 1 Pads puts all the pads in a row, with the MIDI note of each pad underneath it. Clicking a note label selects that pad without playing it.
Each pad shows its name, its number and the MIDI note that plays it.
Velocity when clicking pads
When you click a pad with the mouse, it plays at full volume. If you’d like clicks to be more expressive, choose one of the options under Pad Velocity Sensitivity in the options menu (the default is Off):
- Quieter at the Edges — clicking the middle of the pad is loudest.
- Quieter at Top / Bottom — clicking the vertical middle is loudest.
This only affects mouse clicks. Notes from MIDI always use their own velocity.
Mute and solo
Each pad has small M (mute) and S (solo) buttons along its bottom edge. Soloing a pad un-solos the others; hold Shift (or any other modifier key) while clicking S to solo several pads at once.
The pad menu
Right-click a pad (or Ctrl-click on a Mac) for its menu:
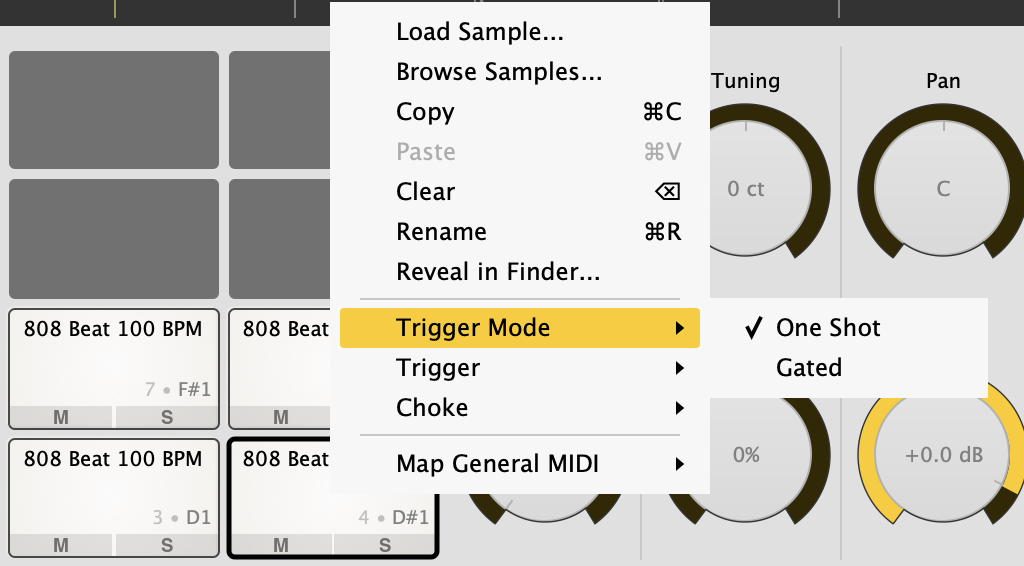
- Load Sample… / Browse Samples… — replace the pad’s sample.
- Copy / Paste — copy a pad, including its sample, knob settings and name, and paste it onto another pad or into another instance of Sitala.
- Clear — empty the pad.
- Rename — give the pad a new name.
- Reveal in Finder… (Show File… on Windows) — show the sample file on disk. It’s greyed out when Sitala can’t find the file on disk, for example for the factory kits.
- Trigger Mode, Trigger and Choke — see below.
- Map General MIDI — see MIDI.
In the standalone app, you can also use the keyboard with a pad selected: ⌘C, ⌘V, ⌘X to copy, paste and cut, ⌫ to clear and ⌘R to rename (Ctrl instead of ⌘ on Windows).
Moving and copying pads
- Drag a pad onto another pad to swap them.
- Drag a pad between two pads to move it there. The pads after it shift over to make room.
- Hold Option (Mac) or Ctrl (Windows) while dragging to copy a pad instead of moving it.
Moving a pad changes which MIDI note plays it (and, with multiple outputs, which output it uses). After a move, Sitala shows a notice that highlights the affected pads, with an Undo button in case that’s not what you wanted.
One shot and gated
By default, pads are One Shot: once triggered, the sample plays to the end, no matter how long you hold the note. This is how most drum machines work, and it’s why making MIDI notes shorter in your DAW doesn’t make a sound shorter.
Switch a pad to Gated (Trigger Mode in the pad menu) and it stops when the note ends — useful for long sounds, pads you want to “hold”, or chopped samples you want to cut off. It fades out quickly rather than clicking.
To make a sound shorter without depending on note length, turn the Shape knob down.
Choke
A pad chokes another pad when playing it cuts the other one off. The classic example is hi-hats: when the closed hi-hat plays, the open hi-hat should stop.
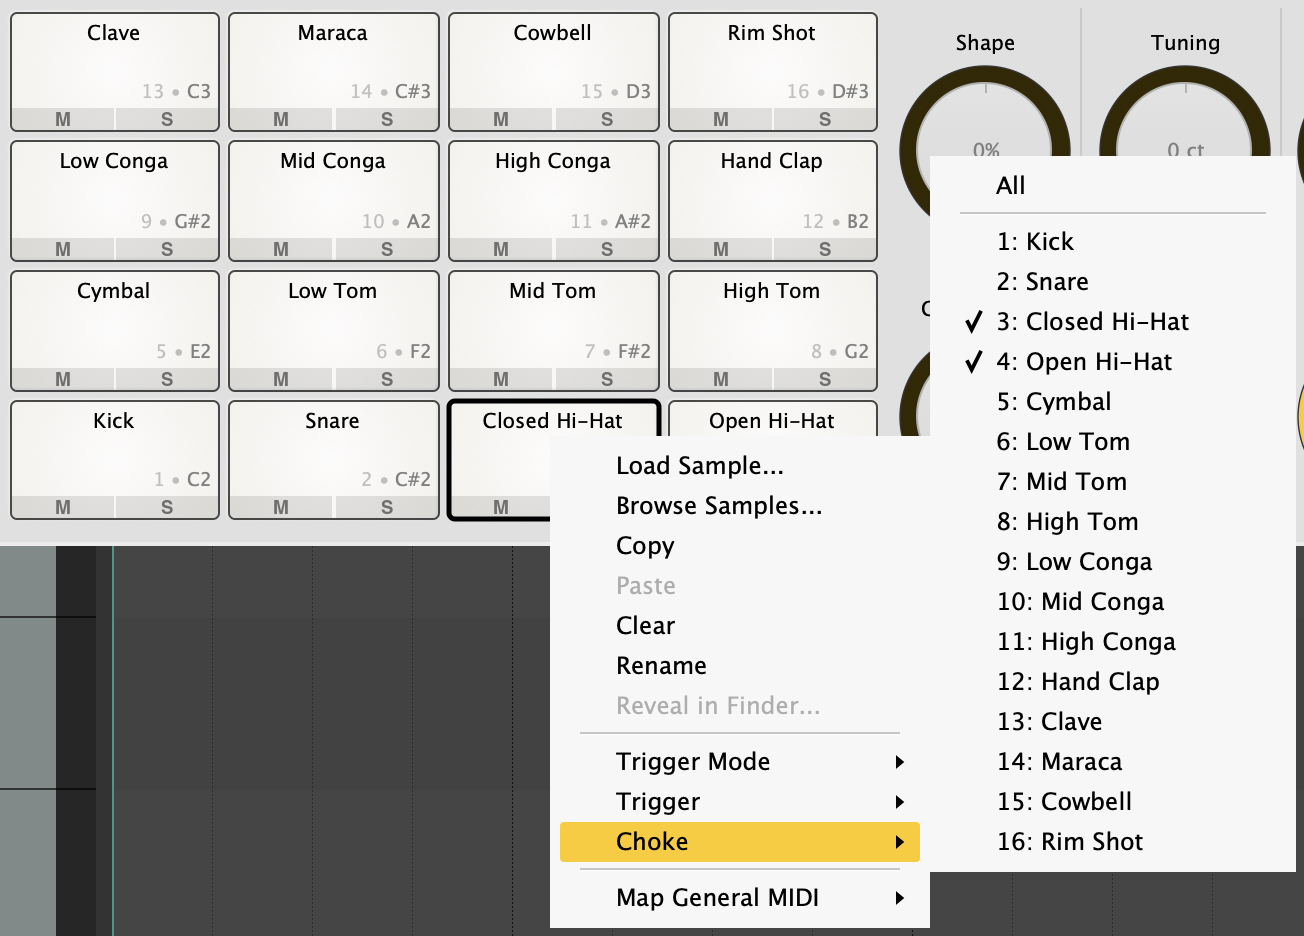
Right-click a pad and open Choke. Every pad with a check mark is cut off when this pad plays.
- New pads choke themselves by default, so playing the same pad twice quickly doesn’t pile up copies of the sound. Uncheck the pad’s own entry if you want hits to ring over each other (for cymbals, say).
- All checks every pad, so this pad cuts off everything else. It only affects this pad. If you want a set of pads that all cut each other off (like a monophonic group), set Choke on each of those pads.
Setting up an open / closed hi-hat pair:
- Right-click the closed hi-hat pad, open Choke and check the open hi-hat.
- If you want the open hi-hat to also cut the closed one, do the same on the open hi-hat pad.
In the example above, the Closed Hi-Hat pad chokes both itself and the open hi-hat.
Loading a new sample onto a pad resets its choke settings to just itself (except when you use the previous / next buttons).
Trigger
Trigger works the other way round: checking a pad under Trigger makes it play along with this pad. Use it to layer sounds — for instance, a clap that always plays with the snare — while keeping each layer on its own pad with its own knobs.
← Getting Started · Contents · Next: Editing Samples →
Contact